


Our week started out with getting all the re bar tied into place.


 |
| A slot was cut out for each piece of re bar to allow for the re bar to pass through the form walls. |
 |
| Several layers of duct tape were added to the sides of each cut out so that they would stay in place during the pour. |
 |
| The cut outs were put back in place. Now when the concrete is poured it will not flow through to the outside of the form. |
 |
| Here you can see the space that needs to be left open and clear of concrete. This will allow for the expansion and contraction that will occur each time the oven is fired. |
Tom then built a protective box around the ash dump so that it too would stay clean when the concrete was poured.


 |
 the support structure. Petie on the other hand prefers to be a sunbather. |
Now we were ready to start mixing cement and pouring.
 |
| While Tom was mixing cement, I dumped mixture into the frame. |
 |
| We'd screed each section as we went across |
 |
| In the end, my hands proved to be the best tool to work the cement around and under the re bar making sure there were no air pockets. |
 
With the pour complete, now it was time for Tom to start troweling. It was fascinating to watch the surface of the cement become smooth as Tom worked the trowel over the surface.
  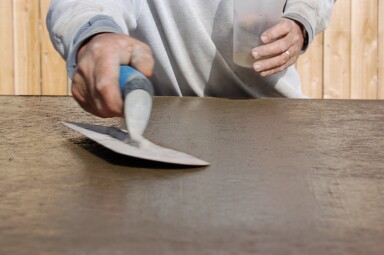
As Tom ran the trowel over the surface the last few times he added just a hint of water to keep the surface moist. At the day's end we covered the whole oven base since the weather forecast had the evening temperatures dipping down to freezing.
  
I did take the tarp and covers off the oven today as well as wet the cement. The covers and tarp were put back on the base this evening since the temps were again going to dip down to freezing.
And this morning I was able to go to the Mason Supply Yard and pick up the Red Brick that Tom will use for the chimney and the face of the oven!

Tom did take the form off the oven base this evening. He did it in the dark with a headlamp on! I'll be sure to post some pictures tomorrow so that you can see how it all turned out. Thanks again for stopping by. Thoughtfully Kath
|


